Make Chalkboard Paint In Any Color You Want!
Did you know that you can create your own chalkboard paint color? I feel like this was a bit life changing for me…I know my life is really exciting! With so many options out there, I decided it was time to write up a little post all about how to make chalkboard paint in any color you want with one ingredient you may already have in your house!
There is something so nostalgic about chalkboards I think. I look back to those days in Elementary school, where we always had those chalkboards in our rooms. I notice now that these days, the teachers have dry erase boards for the most part, which I am sure is so much more convenient and user friendly, but its so just fun using a chalkboard!
Yes, I am one of those that gets the heebie jeebies when I run my fingers across them, but there is just something about them that I love anyways.
Chalkboards also remind me of those days in the past. I imagine little school houses with kids learning their alphabet and a teacher a the front, using a blackboard, writing out all the information the kids need to learn that day.
Sure you can purchase chalkboard just about anywhere these days. You can get chalkboard labels, crates and basket with cute chalkboard accessories. I mean, they are so popular that you can get just about anything you want. But, what if you aren’t really keen on a black chalkboard or don’t really love the green chalkboard paint that you can get at the store? This is where making your own chalkboard paint comes into play.
The great thing about this, is that it so easy to make, and so inexpensive too! I promise that you probably have everything for it, and if you don’t, you can certainly get it for next to nothing.
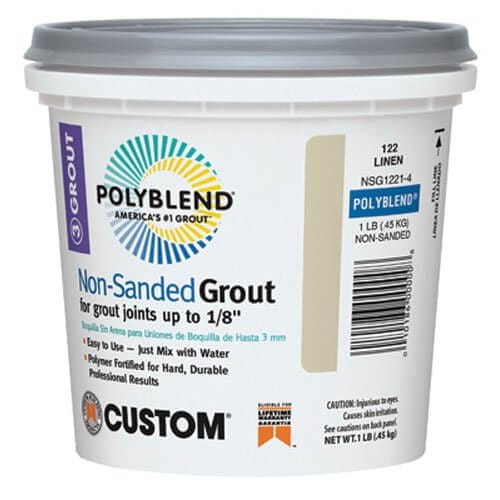
Now, I feel like I might be the only person that has a collection of powdered grout in my garage. But, with so many different tiling projects over the years, it has made sense to keep it all. I will tell you, it has come in handy on many occasions! Non sanded grout is the secret ingredient in creating your own handmade chalkboard paint. NON sanded is the key, so you want to make sure you check that first. I have found a small box of non sanded grout here that would be an inexpensive investment if you are needing some.
A few weeks ago, I did a Facebook live all about how to make your own. I covered how to make it, what I use it on, how to customize different colors, and did a project from start to finish.
I love using chalkboards in my home. I have many, including a chalkboard wall in my mudroom, as well as many customized chalkboards such as my fixer upper style chalkboard.
Having small kids allows a fun place for them to exercise their own creativity without worrying about them drawing on my nice walls. It also allows for a lot of forgiveness. My kids love to draw and draw, and then be able to quickly erase their projects and start again anew with something else. They often leave me silly messages, and I love seeing my 6 year old cute little drawings aroud the house.
We wont talk about the drawings I found on one of my table legs….in a sharpie marker. You can’t win them all, I guess!
lets talk about what we need to make your own chalkboard paint:
SUPPLY LIST FOR CHALKBOARD PAINT:
- White non-sanded grout
- acrylic paint or craft paint in any color you want to use
- water
- chalk
- clean rag
- flat paint brush I prefer using my Zibra Paint brush for this)
Now, we have talked about how much we love chalkboards, but did you know that you can repurpose many items and turn them into chalkboards? I have used mirrors(yes mirrors) and turned them into chalkboards. I have built them out of plywood and MDF sheets of wood. I simply cut them down to the appropriate size. Using old picture frames is a super easy way to make your own chalkboards. I added a thin piece of MDF to a large vintage frame, transforming an otherwise unused and useless item into something so cool.
So, lets talk about how to make your own chalkboard:
If you want to skip the full tutorial on how to make chalkboard paint, then check out this video….this video not only shows how to make chalkboard paint colors, but also how to season and take care of a chalkboard!
Lets talk about how to make your own chalkboard paint. First, here is the recipe that I use for chalkboard paint:
The basic ideas is to use 1 part grout to 8 parts paint.
I always start with a small amount because you honestly do not need that much unless you are painting a wall.
So, lets see what we need…..
- 1 cup paint
- 2 TBSP non sanded grout
This is the kind of non-sanded grout I use
How to mix your paint and grout together:
I like to use a disposable cup or container for this. This is perfect for those sour cream and cottage containers that would otherwise be tossed in the trash. This is the perfect way to give them a second life. I always hate throwing them away.
I like to use a paint stick to stir my paint together.
Once you add the grout, it will thicken up the paint considerably. This is great for a chalkboard project, since you want something that will stand up to a lot of use. Make sure to mix the paint until all the lumps are gone. Adding the powdery grout to the paint will cause lumps. It takes just a minute to mix all the lumps out of it.
I start by painting one full coat on whatever surface I have chosen to use. If you are worried it is too thick, you an add a small amount of water, like 1 teaspoon to the mixture to loosen it up a bit.
A few thing to think about when creating a chalkboard:
- You want to make sure that you let your first coat of chalkboard paint dry completely before you add a second coat. This is important because if you do not, it will pull up the first coat of paint creating a bit of a mess.
- Once you have finished painting your chalkboard, you will need it cure for at least 24 hours. This is a hard one to do, because it dries pretty fast and you will want to use your chalkboard asap! But this is important. If you do not let it cure and use it too soon, you could run the risk of damaging the board. It can also cause the “ghost images” that so many people see on their chalkboard after the first use
- The ghost image is the faded remnant from the first thing you drew. This isn’t fun if you can still see the design when you are trying to create something else. But don’t despair, there is an easy way to prevent this.
How to season your chalkboard:
No, we aren’t seasoning with salt, pepper and other great flavors. We are “seasoning” the chalkboard. You want to have some old fashioned chalk on hand for this. I actually like to use this kind for it.
What you want to do is to lay your chalk on its side and color in the entire chalkboard with the chalk. You do not want harsh lines, you want that cloudy look that you get when you use the side of a crayon or piece of chalk.
Once you have the entire chalkboard covered you will take your clean cloth and rub the chalk around the board. You want to rub it in , while also “cleaning” the chalkboard. You want to wipe and clean off the chalkboard while rubbing it into the surface. This will help to seal the chalkboard. Chalkboards have a very porous surface and adding this layer of chalk will essentially fill in the board and protect it.
Now that you have your chalkboard painted, cured, and seasoned, it is time to get to playing around with it! There are so many things you can do with chalkboards. You can:
- Create daily, weekly, or monthly calendars for your family organization
- There are tons of sources of chalkboard design on Pinterest, you can create seasonal art or trace printables that others have created. Check out my Pinterest Board here. I have tons of great ideas pinned here.
- Use your chalkboard as a source of home decor by using it behind a wreath or wall hanging. You can also create cute chalkboard wreaths like the one I created here.
Whatever you do, make sure to really enjoy the process! I love making chalkboards and I love using them in my home décor! They are so fun to use, especially for the different season throughout the year. Its so easy to change them out no matter what.
Now, I want to know if you have made your own chalkboard paint before~ Leave me a comment if you have any questions or just want to connect!
Have a great day friends!
Looking for more home and DIY inspiration? Check out these helpful posts:
How to Make Chalk Paint with 3 Household Items
How to Paint Furniture Like a Pro
How to Distress Furniture Like A Pro!
