A Treehouse Design Perfect for Kids and Adults!
*I partnered with Wagner on this post. All my opinions are my own. I only endorse items I truly believe in*
Lets just say that my husband often gets carried away when he is working on a project of his own…and noting could be more true than when he build my kids a treehouse a few years ago. The treehouse design began simple and humble and gradually took on a life of its own. Its been two years since he built it and we are only now getting to the true treehouse design. We finally finished up the entire thing and I cannot wait to show you the finished space!
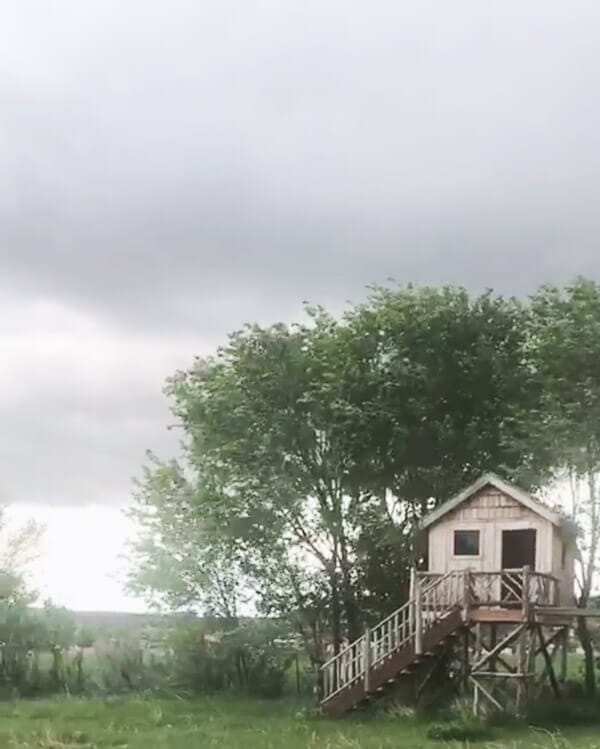
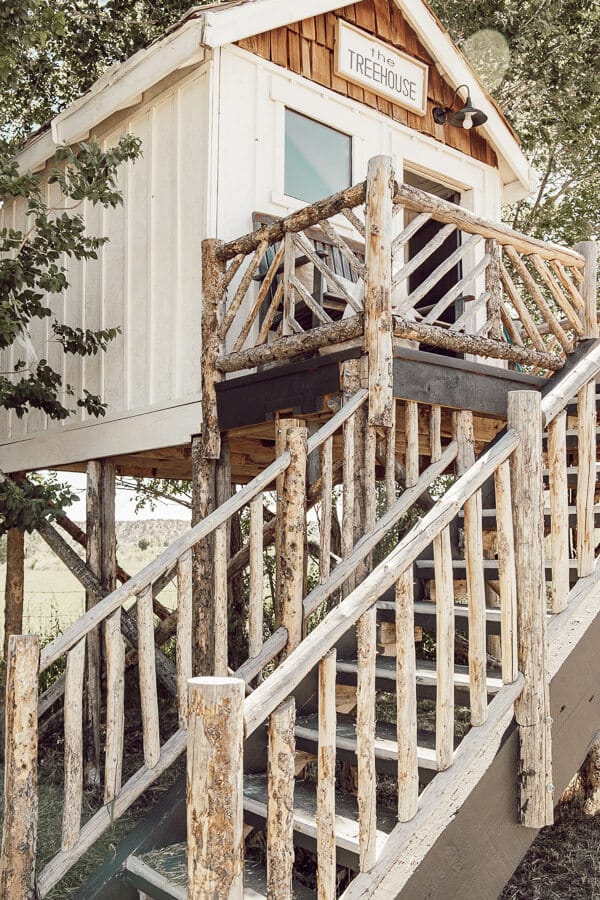
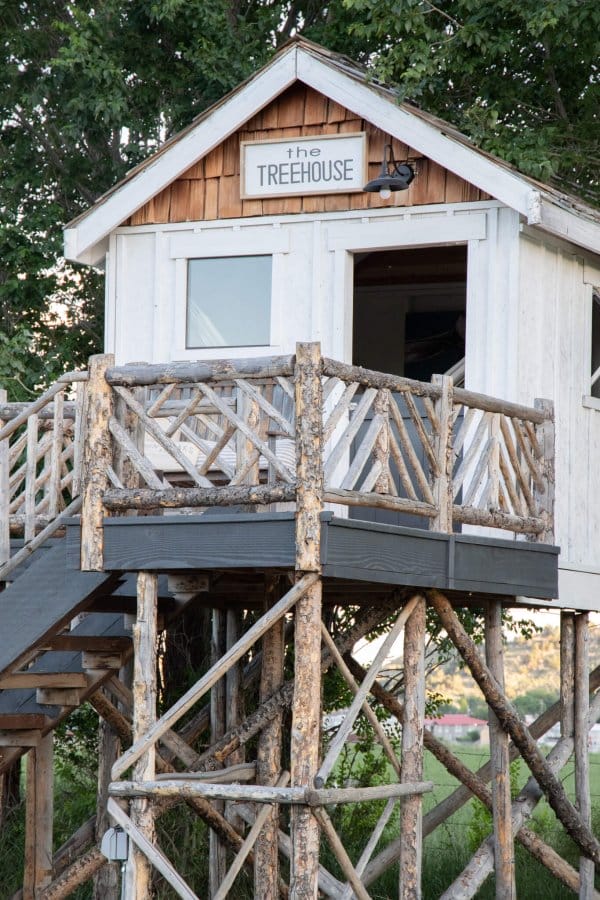
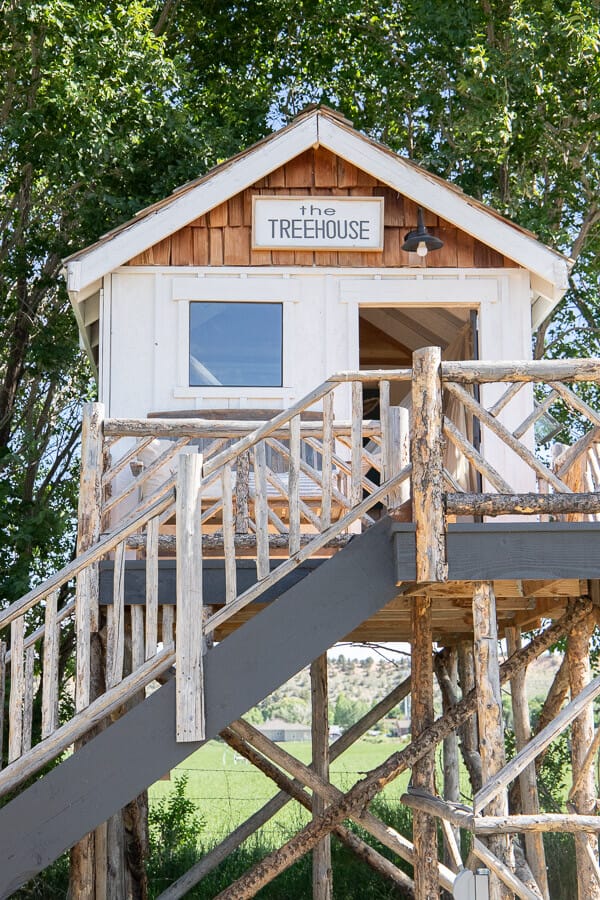
Now, this is not your ordinary treehouse. You see, we didn’t have any mature trees on our property, being that it was new, and thus we had to think outside the box. We ended up building it in a grove of trees, on stilts.
First, I want to give you a little backstory to said treehouse. Two summers ago, we had my niece living with us, and I think my husband had decided he wanted a project that she could help with while she was here. I was so busy working on other projects, that I literally never picked up a hammer to help with this treehouse. Other than a few treehouse design tips from time to time, this baby was all by husbands.
As I would look out and see how the treehouse design was taking shape, what was once supposed to be a simple platform in the trees, gained walls, and then a large roof….it was then topped off with a swoon worthy porch, and plans to simply add a ladder were soon replaced with a full set of stairs.
You see, the goal of this treehouse was to use as little money as possible, and believe it or not, everything we used was second hand, or salvaged in one way or another. Even the staircase was a repurpose! You see, my husbands family owns a few hotels in the area, and they had recently replaced staircases on one of the hotels. We found all the parts and pieces to a staircase in our junk yard…and thus a staircase was born!
We were also able to find a pile of shakes in our junk yard, discards from a long ago project. Second hand plywood and studs were used for the walls and roof. Rough cut lumber was used to build the dutch door. The windows were created by taking apart on old window and turning one into a functioning awning type window.
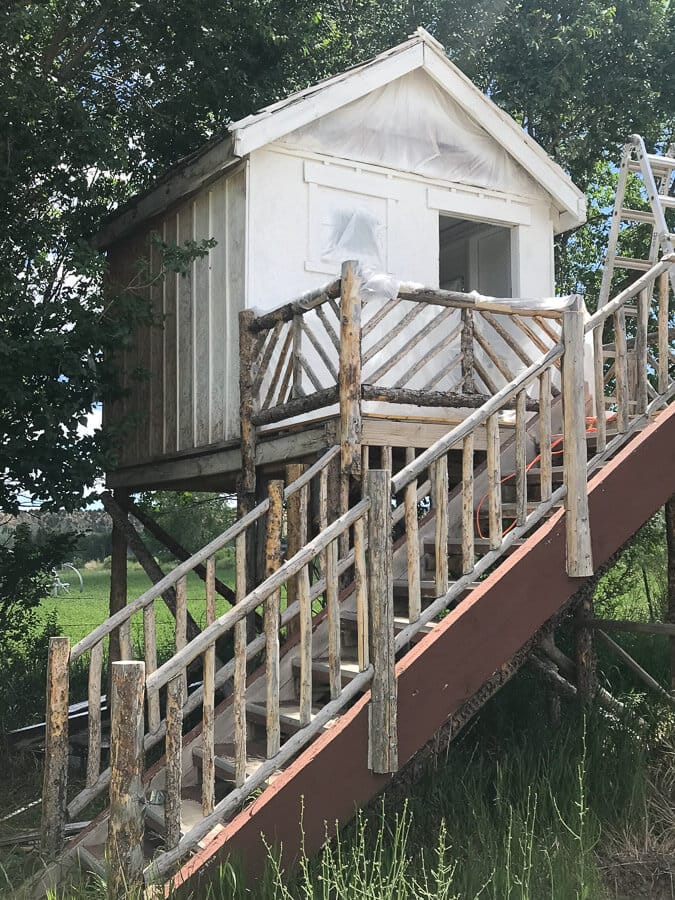
My husband had been building farm fences for years, and thus the log stilts below the treehouse were his design. Once this whole structure was build, the kids would visit it occasionally, but it was in need of some love.
This is what it looked like this spring….
That is where I came in this year. I will give all props to my husband for building this mammoth treehouse, its amazing! I did need a designers touch however. If it was going to be on my property, it needed to be cute…duh.
The first thing I decided was to paint the entire thing white. We have recently built a goat shed not too far from this spot and I wanted them to all compliment each other.
Being that the interior was a bit of a mismatched combination, giving it all a nice coat of white paint was the perfect way to clean it all up.
How I painted this treehouse in no time!
I used the Wagner Control Pro 130. I have used two different sprayers from Wagner and have loved them both, but this baby, it takes the cake!
This is what is called a high efficiency airless sprayer. Different from the Flexio, which I also have. The Control Pro 130 delivers fast coverage with low overspray. It’s perfect for painting the exterior of your home, staining a large deck, and more. Having used this sprayer and the Flexio, I will say this….The Control Pro sprayer is more powerful and can spray more at one time. It’s got enough reach that I did not have to get on a ladder to paint the inside roof of our treehouse.
The stationary paint sprayer holds up to 1.5 gallons of material right in the hopper and has a 25 ft. hose so you can easily complete big projects without stopping.
It’s so efficient, and you can produce up to 55 percent less overspray when using this sprayer. I used 2 gallons of paint to spray the inside of the treehouse. And listen…I am not exaggerating…I painted the entire inside in less than 15 minutes. It was so effective!
It took me longer to tape off and plastic the windows!
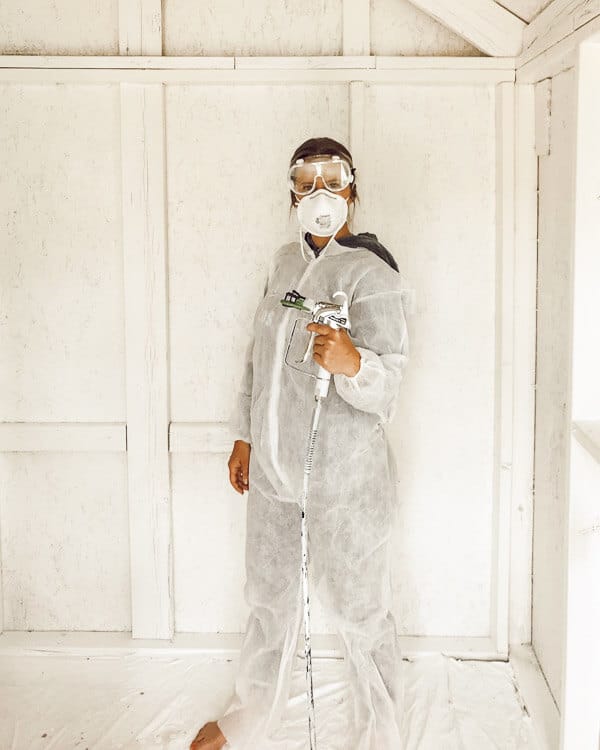
As you can see I made sure to wear a protective suit to protect my clothes, as well as glasses and a mask.
I used the same sprayer to spray the outside as well. Its important to take some time to tape and plastic the shakes, roofline and the window. I also protected the deck and the railings.
I used 2 gallons of exterior paint for the outside of the treehouse. It was so easy.
What I love about the Control Pro 130 paint sprayer….
- It makes painting anything super fast!
- Clean up is easy!
- The hopper holds a gallon and a half of paint of paint
- The 25 foot hose gives you the freedom to be on a ladder and not worry about the weight of the sprayer. I love this about it.
Things to think about before using a sprayer:
- There is a learning curve. If you have not used one before, make sure to read the manual and get familiar with them.
- There is more prep time, including taping and protecting surfaces you do not want hit with overspray
- Make sure to not use them on a windy day!
All in all, I love, love, love my new Control Pro 130 Power Sprayer. It was so great to be able to use one in my treehouse.
Speaking of treehouse, let’s get back to that!
Our treehouse design..
I knew I wanted to paint the entire thing white, keeping the shakes on the eaves and roof their natural color. I also wanted to keep the amazing log railing that my husband built all natural.
That left me with some decisions to make concerning the treehouse design.
I wanted the treehouse to have a bit of the farmhouse touch to it, but with an eclectic boho vibe as well, touches of fun decor as well for the kids.
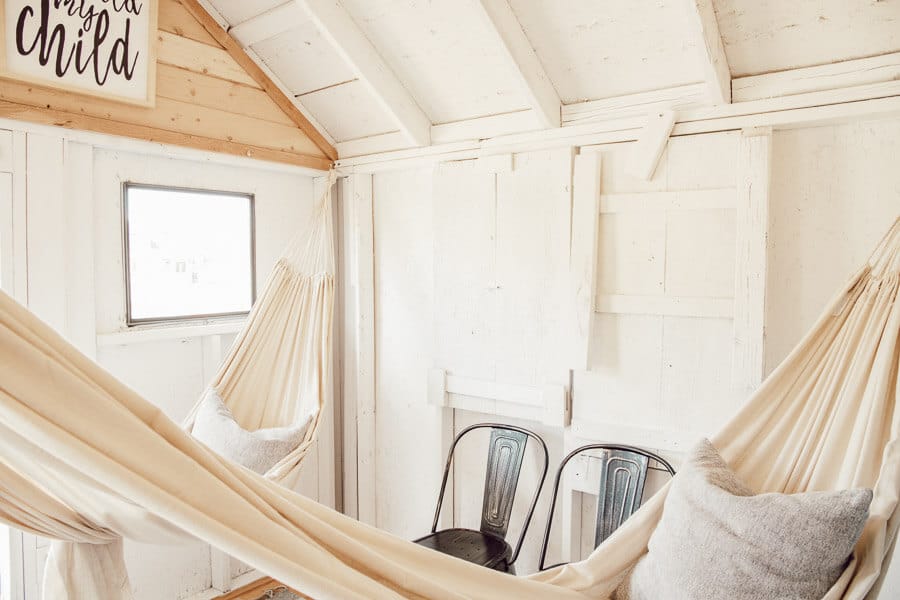
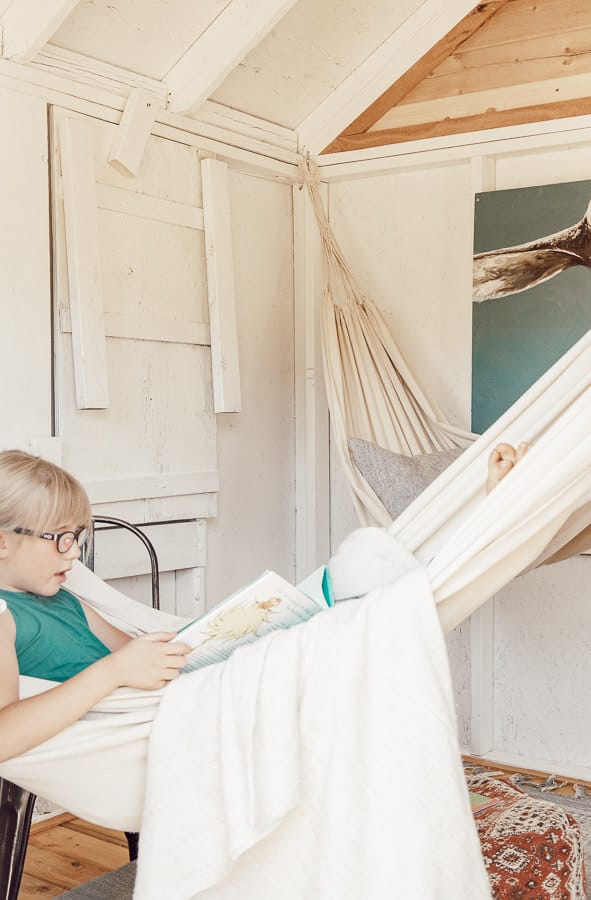
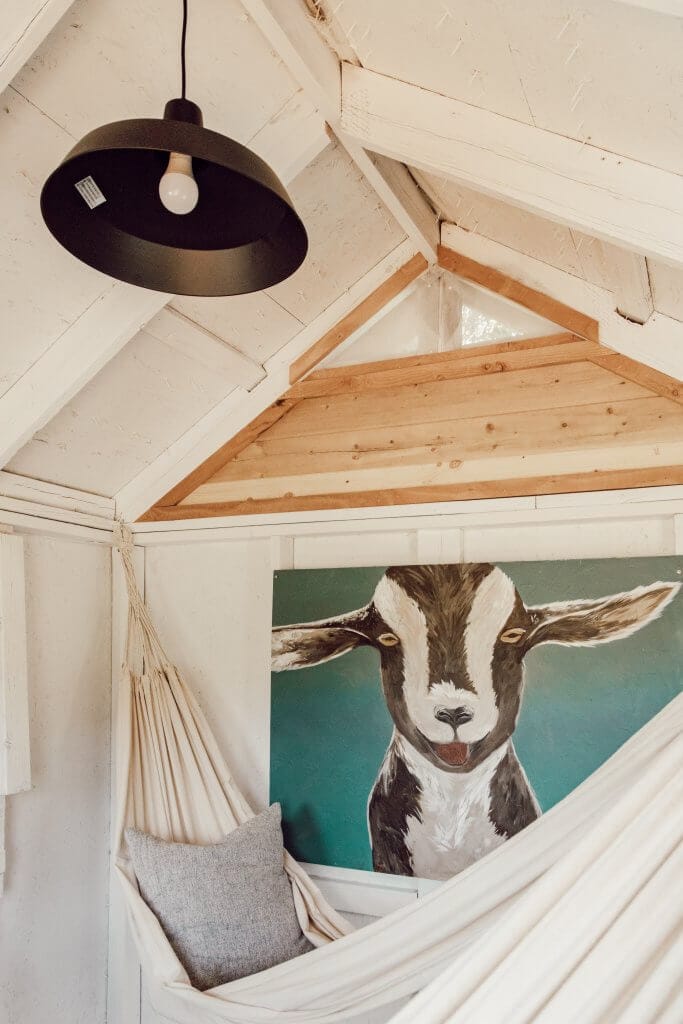
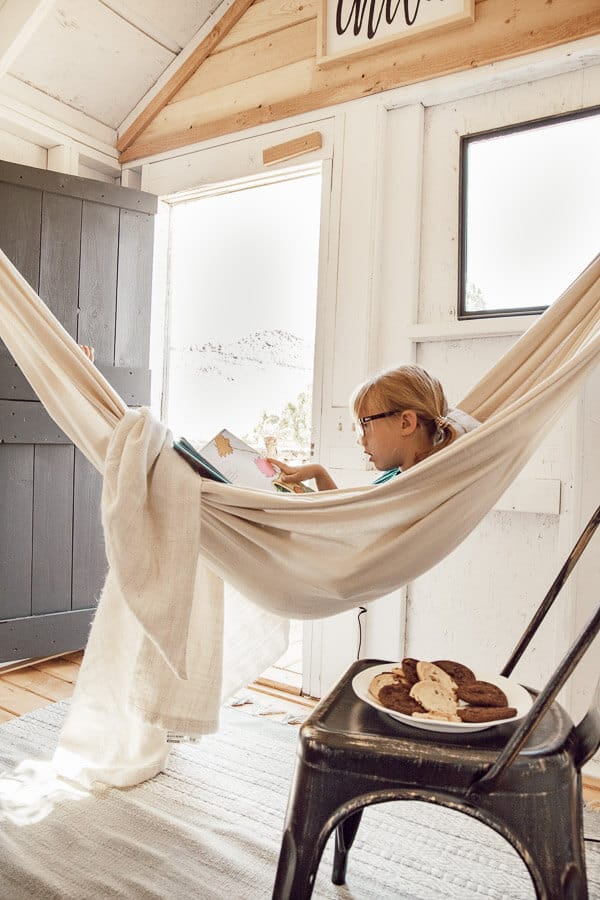
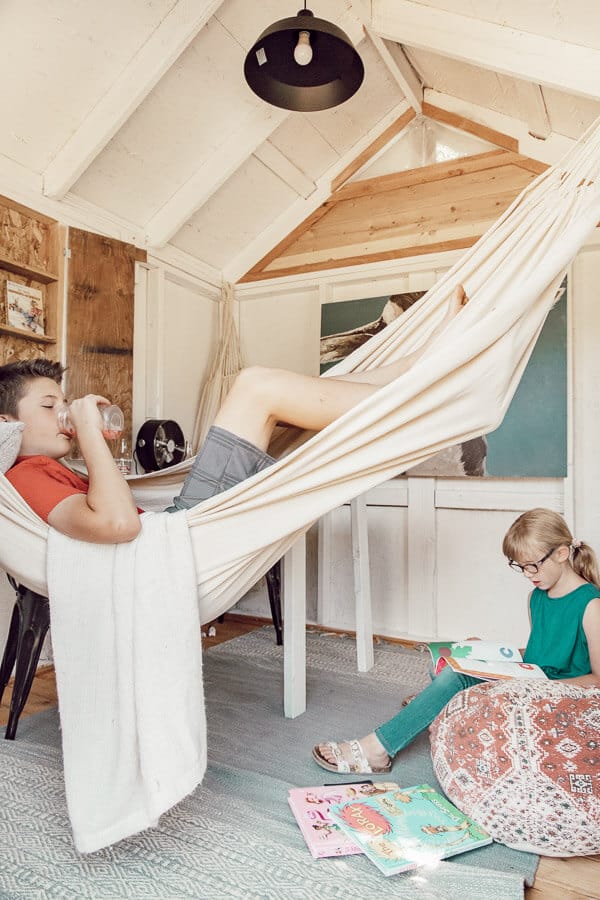
Space was obviously an issue. We decided on hammocks for our lounging option. We designed them so that they could be hung out of the way when not in use, and pulled out and hung when needed.
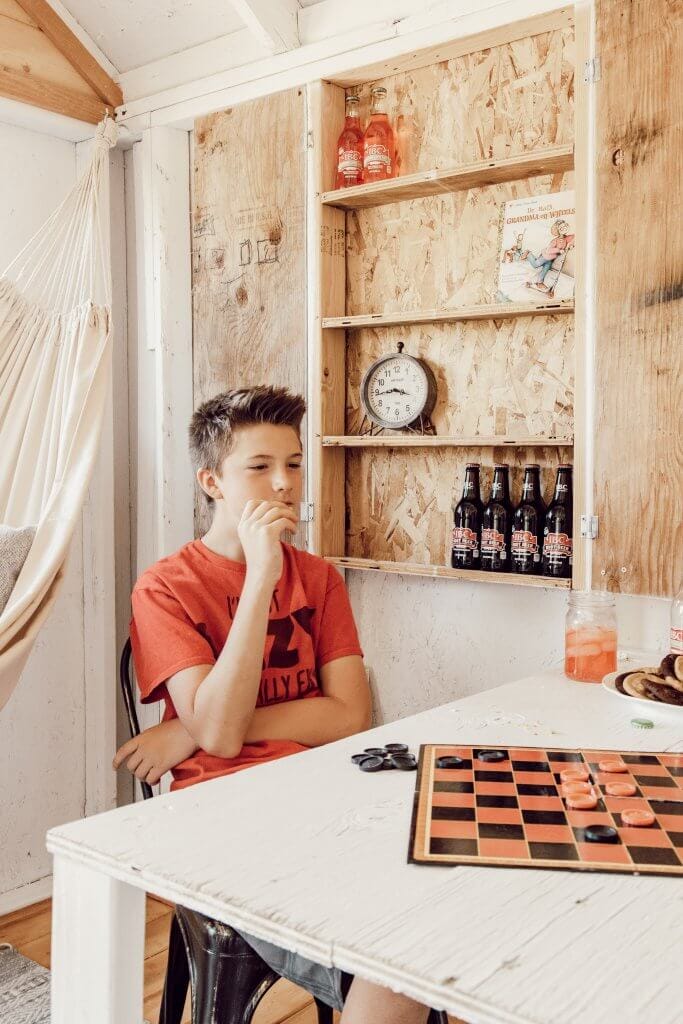
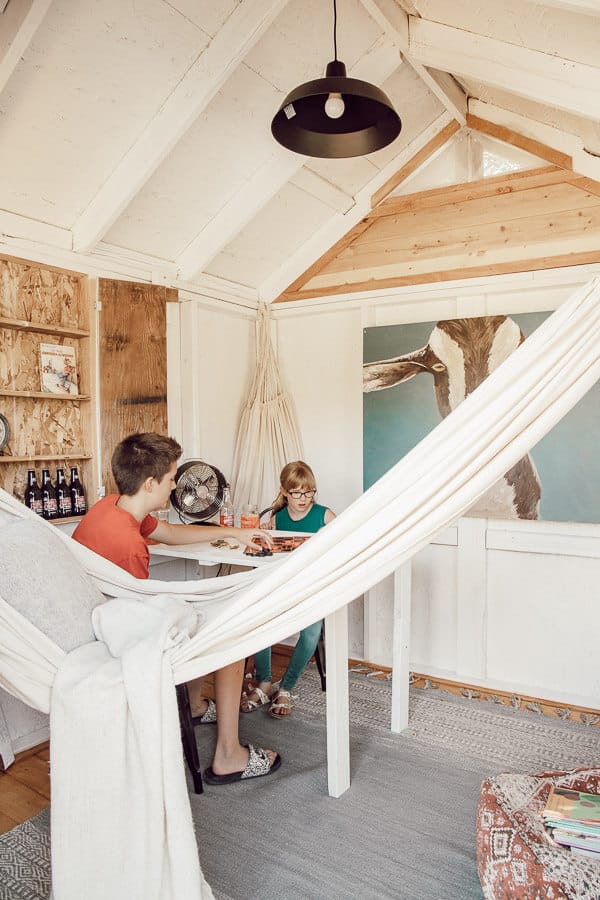
Being that the space was small my husband decided to build a convertible table that could be folded up into the wall when not in use. This gave the kids a place to play games, have snacks and even watch a movie! In this picture, you can even notice it!
Speaking of movies, when we decided to update the treehouse, my husband(who has lofty goals) decided to add power to it. This meant digging a trench, about 80 feet long to the back of our property where the treehouse is. I have to say he is a genius. Having power to the treehouse is a game changer.
We installed 2 lights to the treehouse. One to the outside above the door and one on the inside to provide light in the evenings when they are having sleepovers or playing with friends.
And now they can watch movies, charge devices and more! I know it sounds like we may have overdone it…but I disagree. Its the perfect balance of nature and modern amenities.
A multi-functional treehouse design…
By using the hammocks, folding table, and other design elements we created a multi functional space for the kids. If they want to spend time out there playing games, they can pull out the table, and still keep up one of the hammocks. They can also hang both hammocks and have the entire space to do whatever they want.
If they want to chill and relax(or if mom and dad want to) they can fold up the table and hang the hammocks easily with one hand.
We installed a simple pine floor in the treehouse and on the deck. We wanted something that was easy to clean but looked good as well.
I ended up using a porch sealer on it all to protect it from the elements.
I also added an area rug just to soften the space. You can easily take it out and shake it off to keep clean.
In addition to the folding table, my husband also added a cute cabinet to keep their root beers, and other treats.
When you fold them up, they blend into the wall seamlessly.
To balance the wood floor and to hide some ugly electrical, we added more tongue and groove to the eaves inside the treehouse. I love the pop of wood up there and decided to keep it natural and not paint it.
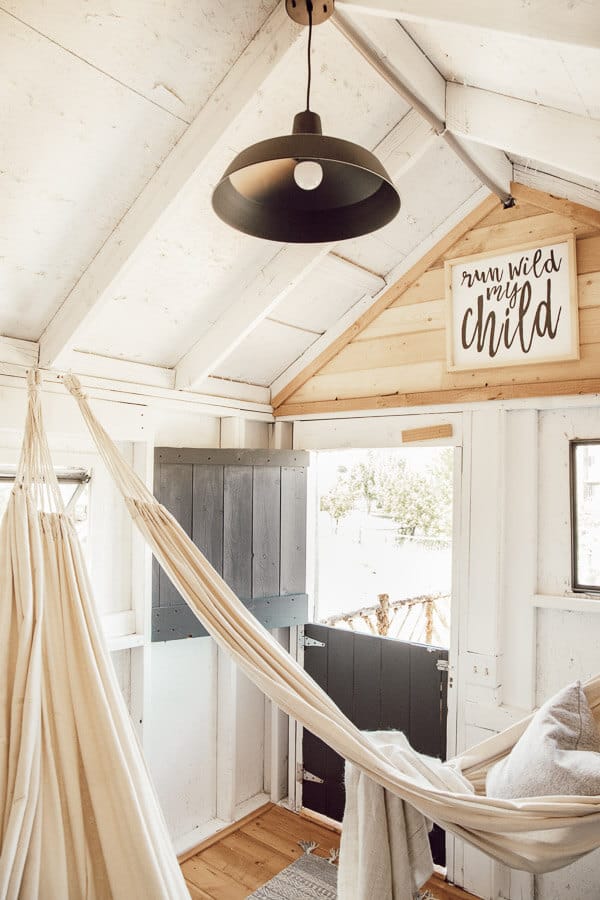
We gave the staircase a quick update as well by painting the stair treads and the beams. I painted the dutch door the same color as the stairs for continuity.
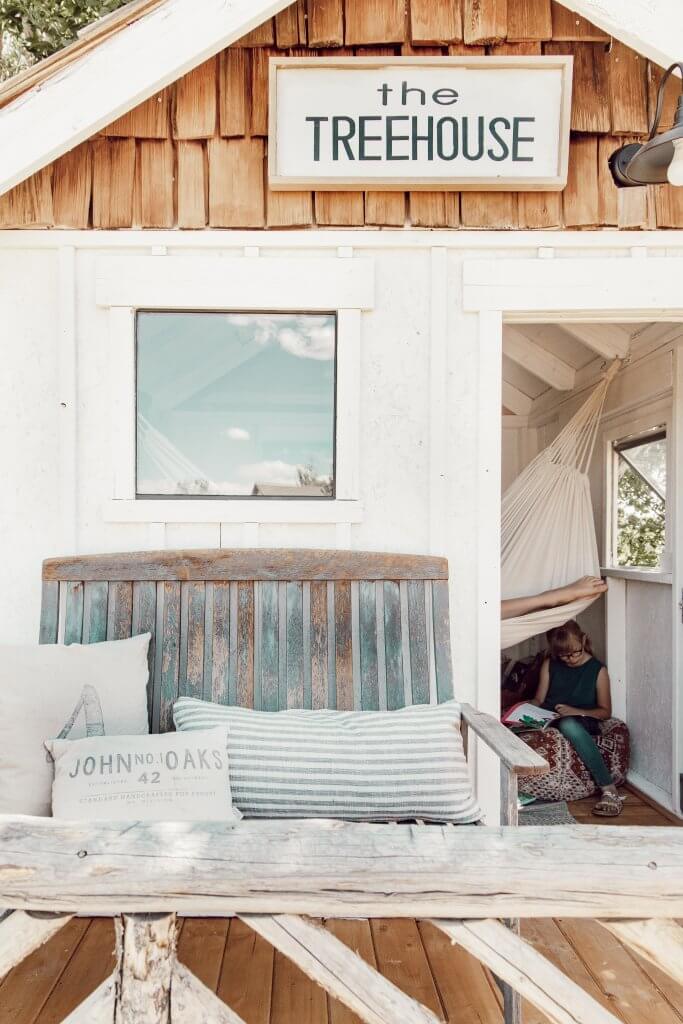
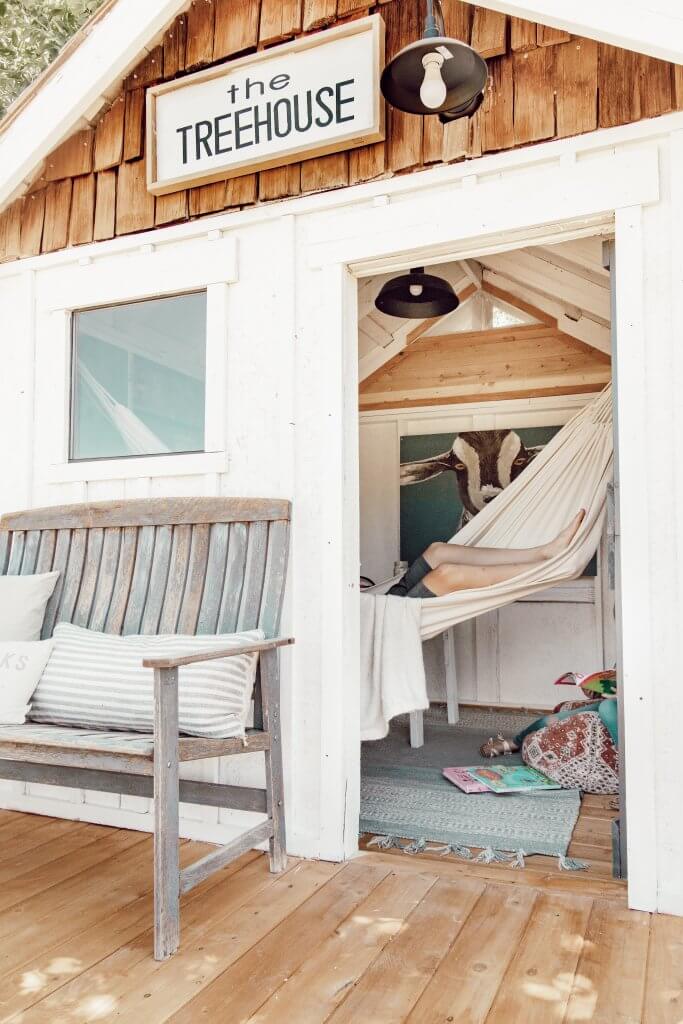
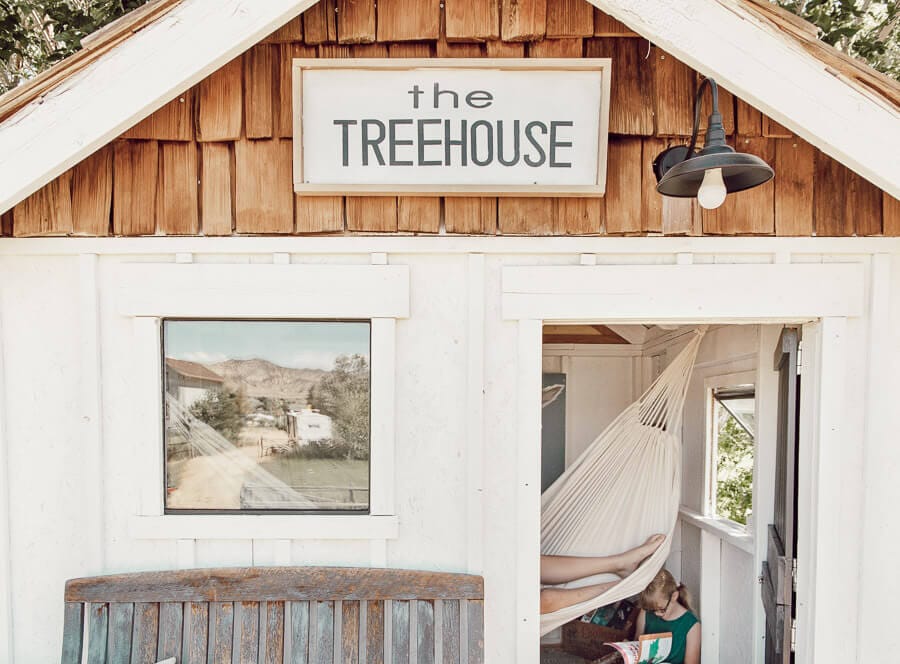
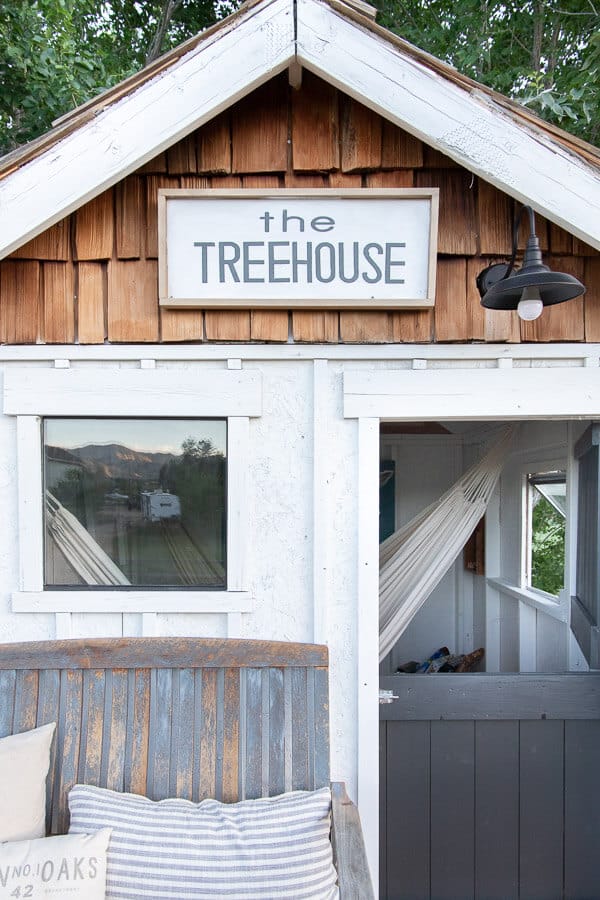
We added an adorable light above the door and I made a really cute sign that reads “The Treehouse”. Its the perfect touch to the outdoor area.
I added an old bench to the porch for additional seating and some of my cute outdoor pillows. The views from this porch are spectacular, especially in the evening, and believe it or not, my husband and I spend a lot of time sitting here!
The interior treehouse design:
Now lets talk about the interior a bit more. We’ve talked about how I painted it all white, but now lets talk about how I made it cozy and fun for the kids.
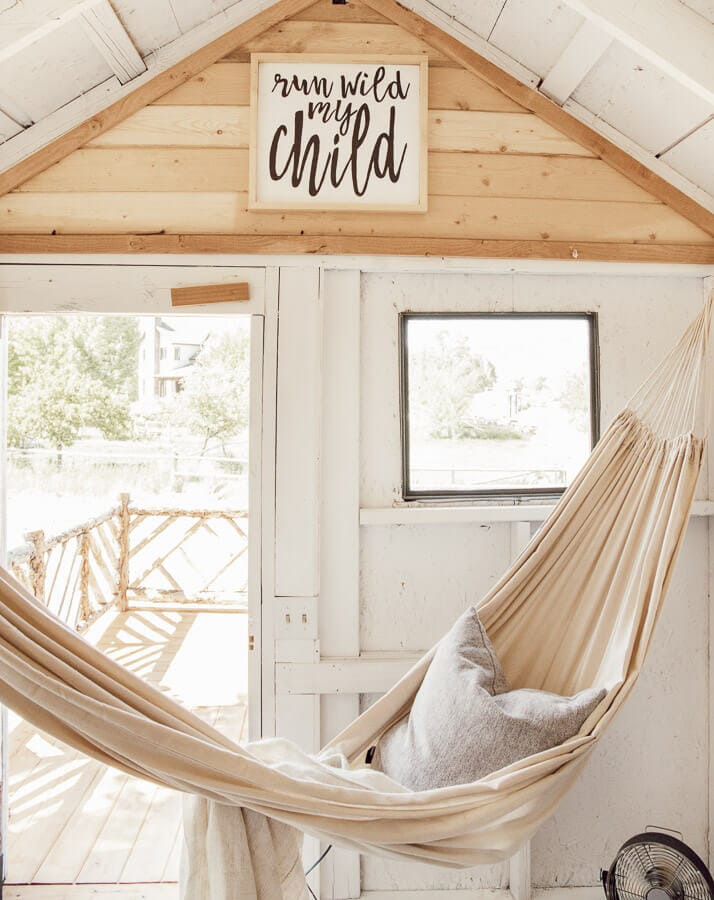
When you first walk in, you see it…the goat painting. My kids asked me if I could do a goat painting for the space and of course, I obliged, since suddenly we are goat people!
We have the interior set up to be multifunctional. They can hang the hammocks or hook them in the corners and have the entire room open for whatever they are doing.
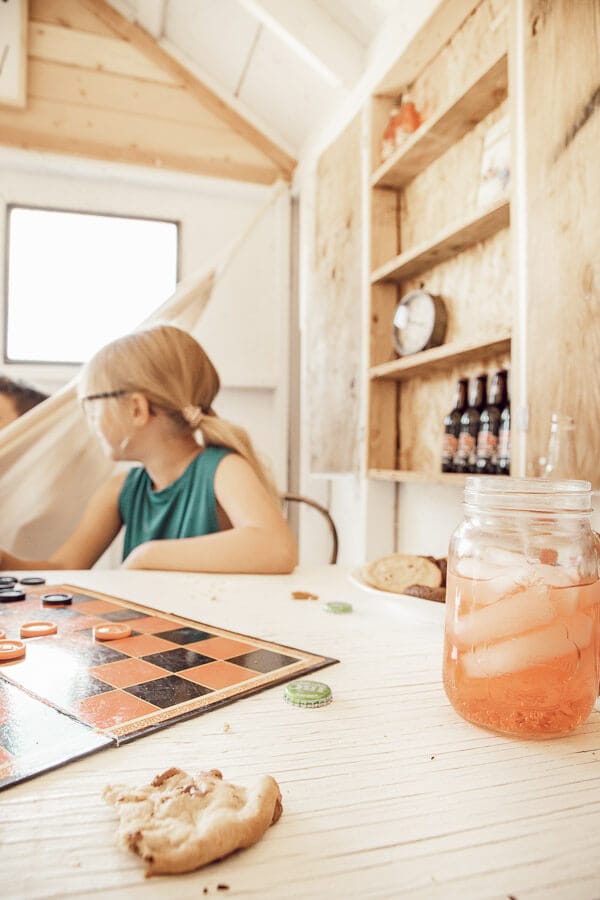
Say they want to play games and have treats? We have that covered….

Do you see my camera lens sitting there? Yep, sometimes its hard to get the perfect pic!
I incorporated a few metal chairs that can be used at the table, around the treehouse to sit and chill, or sometimes it is used as a cookie table.
One of my most favorite features in this room is the sign I made for above the door and window. “Run wild my child”
I wanted to create a space that was inviting for the kids, a place that they could spend hours playing together enjoying each others time. But, I also want it to be stylish, because, well DUH!
It fits the bill! Its cozy, adorable, fun for the kids but a place the adults can hang out too! I love it, and I love that my husband gets a wild hair and builds these types of things for our kids to enjoy.
I hope you enjoy this tour of our new treehouse! Now we are off to have a fun sleepover in it as a family….it may go well..it may end up a disaster!
If you’re looking for other great posts, check these out:
Painting and Distressing Furniture 101- Bringing Farmhouse Style Home
How to Distress Furniture Like A Pro!
17 Farmhouse Painted Furniture Pieces You Will Want to Steal
One Room Challenge- Farmhouse Laundry Room Reveal!





Your treehouse is adorable! I love the goat painting! Can you tell me how you made the “run wild my child” sign? Thank you!
Hi wendy! I actually used my Cricut Maker to make that sign! I will have a tutorial up soon!
The tree house is absolutely adorable! What a beautiful job your husband did with construction and your design touches make it a cozy fun place I would love to escape to!
Thank you, we love it!
I just got around to reading about and looking at the finished tree house. Wow, it is amazing! Your husband designed it so well and you have painted it and furnished beautifully. All those little touches you and your husband have added, makes the tree house of everyone’s dreams. Hope you and your family will have many happy years up there!
Thank you so much! We truly love it! It was a lot of work but we are so happy with it!
Adorable! I was curious, do you have a post about the goat house you mention in another post? I would love to see what that looks like.
Simple and Stylish Goat House Design
did you diy or buy the hammocks?
Yes we did, there is a link in the post.
Love this!! Would like to know the size of the platform and how big of a porch you left?
the playhouse is 8 by 8 and the porch is 3 by 8
We love your tree house. We recently had a tree fall on our house and unfortunately (or fortunately) the kids’ playscape and trampoline took the brunt of the damage. We are looking to replace it with a tree house that they can use for years to come. We were wondering, what are the dimensions of your tree house?
It is about 9 ft by 9 ft.
Boy, how I love a good treehouse (I’ve been sketching treehouse design ideas since I was little, ha). and this one is really neat!
I’m curious, how did the family sleepover work in there? Did you all fit and enjoy it? How’d it go? 😀
The kids loved it! I ended up sleeping in the house!
Hi! Just wondering if you did a post with the dimensions of the treehouse/plans to build?? LOVE it!!
Hollie
I do not have plans for the treehouse yet.
Hello, I love your treehouse! Two quick questions: I see that you have the plans available for the chicken coop. Do you have buildable plans for the treehouse as well? Also, I don’t see the link you referenced in previous comments for the hammocks. Oh yeah, one more….we are planning to purchase and build the chicken coop; however, can you provide a general idea on size for now so we can determine how much the build might cost before we commit to it?
Thanks so much!
Your treehouse beautiful! Do you have the plans? If so, I would love to have a copy, if you are willing to share it! Thanks!
Sorry we do not! Hopefully soon