Make Your Own Witches Corn Husk Broom for Halloween!
WHETHER YOU GROW CORN AND HAVE YOUR OWN CORN HUSK, OR WANT TO PURCHASE SOME, THIS IS A PROJECT YOU WILL WANT TO TRY! MAKE A UNIQUE WITCHES CORN HUSK BROOM TO INCLUDE IN YOUR HALLOWEEN DECOR AND CREATE SOMETHING PEOPLE WILL WANT TO TALK ABOUT!
A some of you may know, I just got back from a pretty fantastic vacation in Hawaii. It. Was. Awesome. Anyways, before I left I had to do a little harvesting in my garden. I had a wheel barrow full of corn I needed to take care of.
Once I had shucked all that corn I them had a wheel barrow full of husks. I didn’t think too much about them at the time. Really, I don’t think about them, well, ever. But the day after I got home from our vacation, I noticed this huge pile of corn husks. I started to brainstorm. They had been sitting out for about 10 days. The were dried out just the right amount. The first thing I thought of was a wreath…..I’m still working on that one. The second though was to make a fun Halloween witches broom. So, out to the backyard I went to find that pile of tree trimmings I used to make my twig wreath.
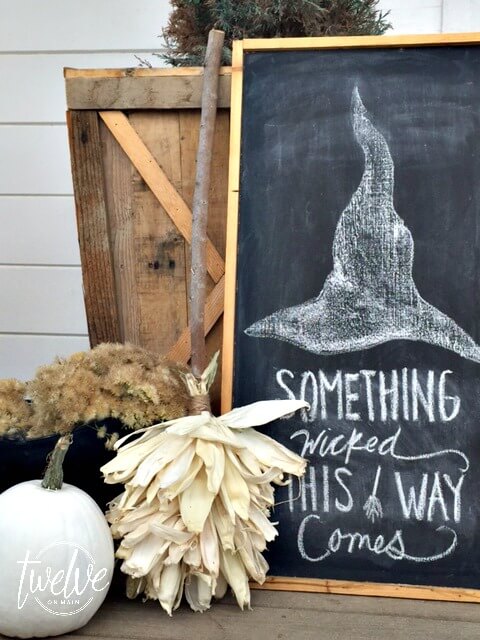
This is what I came up with…
Here is what you need to make your own corn husk broom:
- a stick
- corn husks
- hot glue
- twine
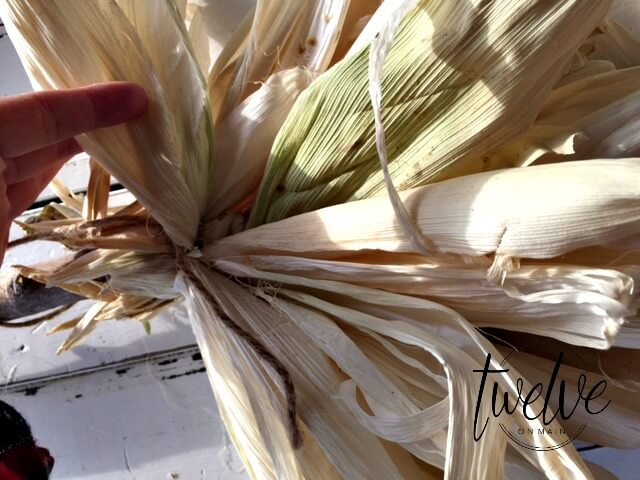
Now, the method I used to create this broom was by using layers of corn husks. I started out with my first layer at the bottom of the stick. Once I had the layer fully around the stick, I tied the husks off with my trusty twine.
I then added three more layers, gradually bringing them up the stick. I tied each layer off with twine. *Helpful tip* Make sure you tie the husks off good and tight. Once the husks dry completely, they won’t budge.
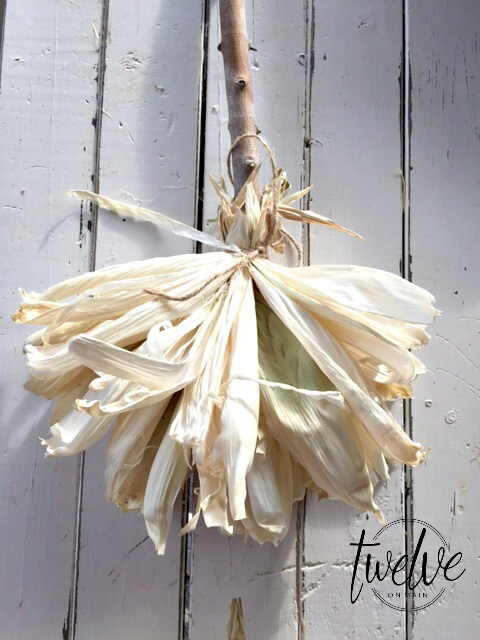
Here it is with a few layers.
When I was happy with the amount of corn husks, I tied the last layer off with twine and then I wrapped twine around the top of the “broom”. I wrapped the twine as tight as I could get it.
Once I had the twine tied off and was happy with the look, I let it sit for 24 hours to dry completely. *If you are using corn husks that are completely dry before you start, you cna soak them in some water for a bit to make them more pliable.
I styled my witches broom with some new chalkboard art and one of my painted pumpkins.
I am excited with the final product and even more excited about how easy it was! I think it adds a touch of whimsy to my fall porch decor. I am not big into crazy Halloween decorating, and my goal is to create decor that blends seamlessly with my style. Honestly, I could keep this around all year. It has those yummy rustic touches that I LOVE. What do you think? Is this something you would make, or a variation of it? I would love to hear from you! I am loving the way my fall porch decor is coming together and can’t wait to do a full reveal here on the blog! Stay tuned!
Have a great day!


This is such a great idea! I will have to add this to my to-do list of projects, it is too cute!
I’m so glad you like it! Thanks for stopping by!
Thank you! And thanks for stopping by!
What a cute broom! I would have never thought to use corn husks for a broom but I LOVE how it turned out!!
Thank you! It was a fun project to do! I love taking out of the ordinary items to create something unexpected!
I love love love this! will have to make a couple of them! thanks
Thank you!
I adore this idea 🙂 It’s so flipping cute!! Will be featuring you this Thursday for the Think & Make Thursday party 🙂 Thanks for sharing it!
Thanks you Heather! I will be on the look out! I love your link parties!
Now that is the cutest witch’s broom ever! Love that you used leftover corn husk!
Thank you! Thanks for stopping by!
Hi Sarah, I love the chalkboard so much that I had to copy it on our front porch!!!! But I made sure to include a link back to you on my blog post (just went live)
http://littlebrags.blogspot.com/2015/10/halloween-front-porch.html
XOXOXO Christine from Little Brags
Thank you! And thanks for linking back!