DIY Peg Coat and Hat Rack
Just in time for winter! Are you looking for an easy and stylish way to hang all those coats, jackets, scarves, and hats? Well, this project is just for you! This DIY peg coat and hat rack was so easy to make. And I promise that! I literally made this in less than 20 minutes. That doesn’t include the drying time of the glue, but other than that, I promise, you can have this baby up and ready to go in no time!

The reason I decided to build a peg coat and hat rack is because I really wanted something in my entryway that I could hang coats and hats, but also a place where I could display some pretty things as well. I also wanted something more organic and simple…..with a but of that Amish style.
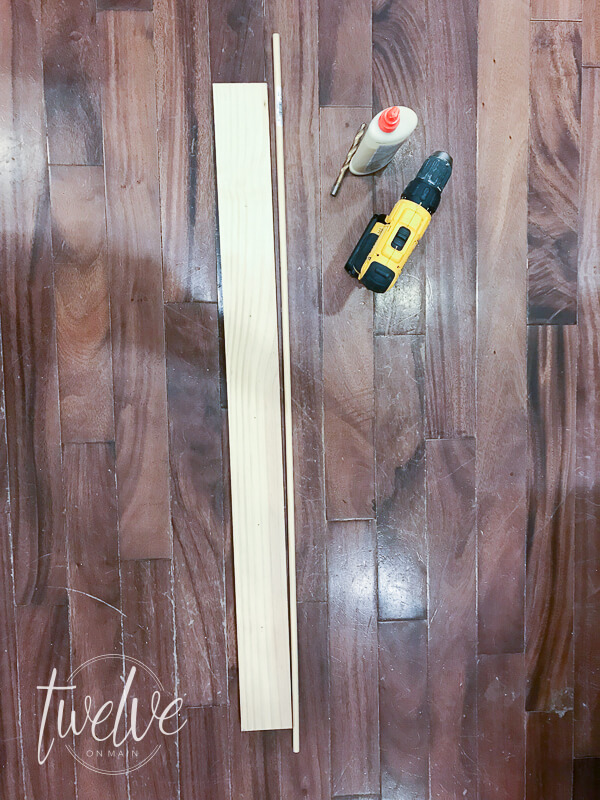
Here are the items I used to create this simple DIY peg coat and hat rack:
- 1 by 4 or 1 by 6 inch wood, cut to the length you want it to be. I wanted mine to be abut 5 feet long
- wooden dowel(you can use whatever size appeals to you. I used 3/4 inch
- cordless drill with a drill bit the same size or slightly smaller than the dowel you purchased
- wood glue
- hammer
- hand saw or miter saw

You will want to start by deciding how many peg hooks you want to have.
I decided I wanted 5, since having an odd number is visually pleasing to the eye. Next its time to start cutting your dowels.
I cut mine 6 inches, and one inch will be recessed into the board.

Next, you want to mark where you will be putting your pegs. I measured the middle of the board going vertically and horizontally and then marked where they intersected. Then measure the distance from the middle of the middle of the board to the end and divide make 2 more marks evenly spaced. Now do the same to the other side.

Once you have marked the spots that you want to put the pegs, get your drill out and drill holes on each one of those spots. I ended up drilling through the whole board, so that the pegs can be more secure.
Once all the holes are drilled, its time to install the pegs.


You want to take the hammer and hammer the dowel into the hole, creating a tight fit. That baby ain’t going anywhere.

Once they are all in, I sanded the edges of the dowels, and gave the whole thing a coat of my DIY weathered wood stain.
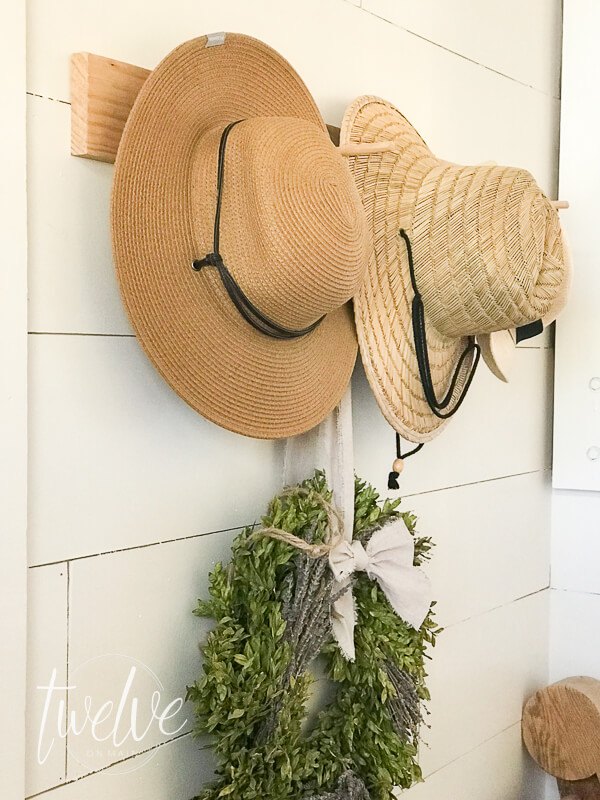
I hung it in my farmhouse entryway, and added a few bits of Christmas to the space.

I love the addition that this DIY peg coat and hat rack has made to my entry. I hung a few of my favorite hats and my absolute favorite wreath made my the Knud Nielsen Co. Boxwood and lavender never looked so good.


Simple yet pretty lovely if you ask me. This peg coat and hat rack cost me under $10.00 to make, which makes the end result that much sweeter.


Make sure you PIN IT


It looks easy to make, I hope it will really be. Thanks for the creative idea.Great!
Can an absolute beginner take this project up?
Yes!